Showing posts with label Mini Album. Show all posts

Thursday, July 03, 2014

Leaky Shed Studio with Sonia

Hello crafty friends --Sonia Doneghue here for The Crafty Scrapper!  I'm really excited to share this project with all of you as I had an opportunity to fuse my love of paper crafting with my love of urban and not so urban exploration.  You see, when I'm not painting chipboard I enjoy exploring abandoned places and spaces and capturing images to share with others.  My motto is that "I find beauty where most see atrophy."  I hope you are able to see the beauty too.


This lovely chipboard album is by the fine folks at Leaky Shed Studio and can be purchased at The Crafty Scrapper.  Fortunately, my album is shaped like a camera.  I also want to mention that all of the gorgeous paper I used in this album is from the "Accomplished" line of papers by Authentique.  You can find this paper right by the checkout!  A little bit about the cover which is typically my most embellished part of the book...I wanted to create a contrast between something beautiful and something, well, a bit on the mucky side because that's definitely what this book is about.  I chose a soft damask print for the background and then a bold brick print for the accent pieces of the camera.  All of the paper embellishments including the alphabet are by Tim Holtz and the flowers are by Prima.

Lets look at a couple of pages on the inside...


I really liked the way this turned out.  I'm not gonna lie, I was so frustrated with this page that I wanted to put the pictures sides by side, glue the Maya Road light bulb in the middle and call it a day.  But I walked away, got some sleep, and in the morning I churned this out with ease.  


The photo on the left flips open so that you can see the entire picture on the right and you can also read some details about these photos.  And just in case you can't see the print, these photos were taken in the ghost town of Medicine Mound, Texas which is located between Amarillo and Dallas.  We found the structural remains of a filling station and some really neat relics including the gas pump.  We continued down the road and drove through a field (remember, not so urban exploration) and found a very old grade school.  You can see that edifice on the cover of the book.  I don't think class will ever be in session again.  Or will it?

I'd like to share just one more page with all of you because I used a really neat technique that you will want to try on your next project.  Hold off on the coffee, you're going to need a steady hand for this.  


For this page I took a Maya Road linen heart and laid a stencil over it and then gently applied a thick coat of Wendy Vecchi's Embossing Paste in white.  I promise, once you do this you will want to do it over and over...just imagine the possibilities.  I also stenciled some beautiful black birds on other linen hearts for a different project.  About the photo:  The gorgeous statue on this page was found in an overgrown cemetery in South Texas.  I doubt that old place has many visitors, but I have a hunch that this statue restores hope for the disregarded.

If you would like to see the entire book and read some insight behind the photos, please stop by my blog, Ms. Ruin's Playthings, for all of the details.  You can also see the book on display at The Crafty Scrapper.  

Until next time...take flight!

Sonia Doneghue

Monday, March 24, 2014

Little Monster Mini Album with Amy


Hi guys, it's Amy here today to share a peek into a fun project using Bo Bunny's Our Little Monster paper line.

I am a huge fan of all things Bo Bunny. So I was more than a little excited to get this paper in my design team box. Most of you know I came into my stepson's life when he was a little older, and sadly I don't have toddler pictures of him that would have been so appropriate here! The next best thing? The beastie's little boy that I have known since he was a premature newborn weighing in at less than 2 pounds!! These pictures capture the essence of who he is and the "little monster" theme is how we think of him. He says the cutest things, the does the cutest things, he's just a hoot.
Just a look into the beginning of the creative process...it's messy and never quite turns out the way you think it will!


Here is the cover of the Maya Road canvas and chipboard album I chose to use for this project. I used Dylusions inks to mess up the canvas as the background. The B is for Boy came from the paper line, I don't usually like fussy cutting but this worked on the cover.  You'll see in later pictures how I made used the monster in the back of the book that played into what you see at the front of the book!


This is the first page inside the album, and my favorite. I kept it simple here, a Maya Road scroll and a handmade flower - letting the picture take center stage. See the button with the paper around them? That is a Maya Road kraft paper doily, cut down to the scallop part and used to make a flower!


Sometimes when doing an album I catch myself feeling like all the pages look the same. They don't  - but that's the tricks a tired brain can play on you. When I need to shake that off I do an "inside cover". A page that doesn't have a picture but that still works with the album. The monster on the paper, along with the Maya Road "&", seemed a good fit and the bow tie I gave him just makes me smile.


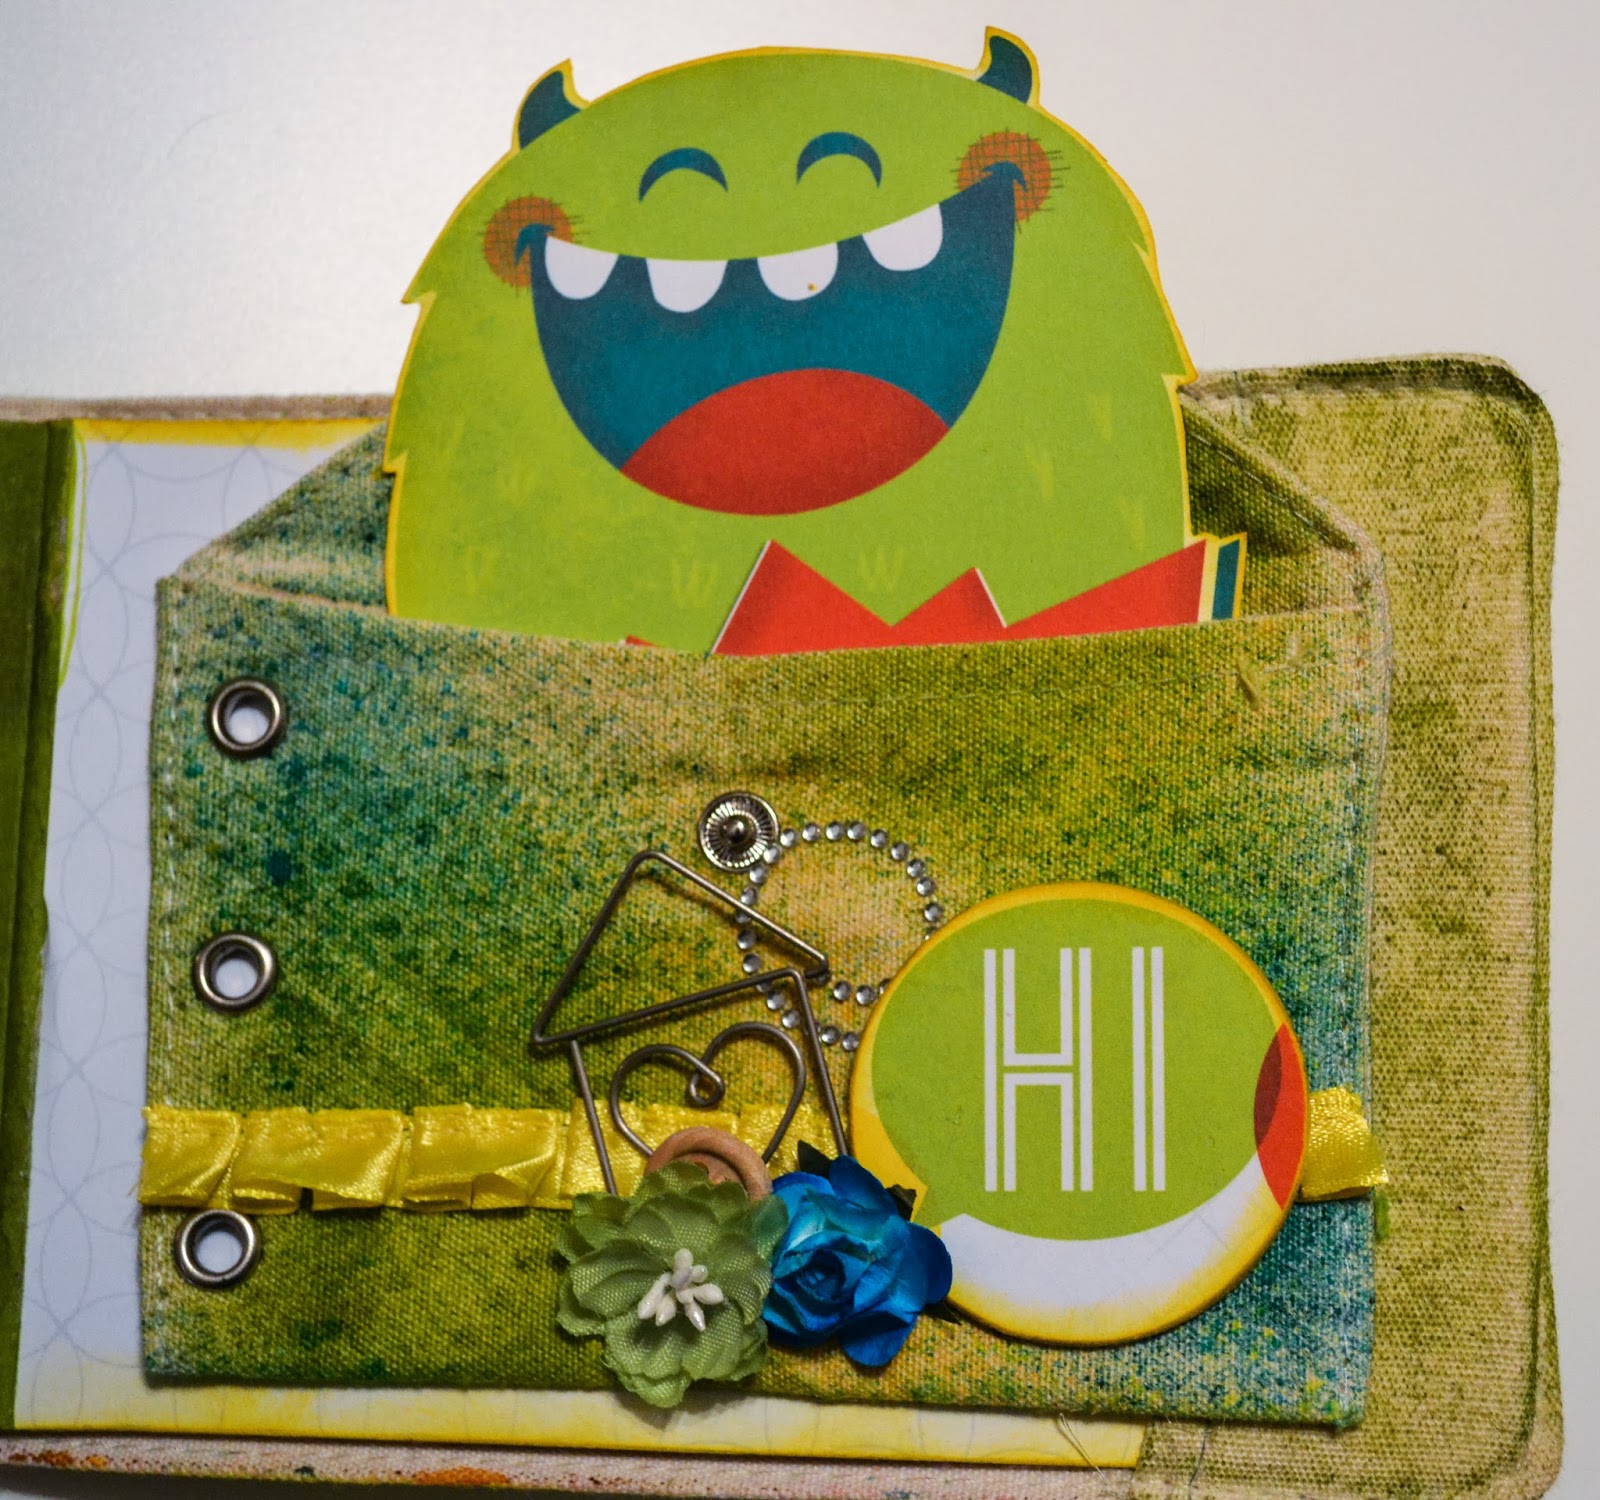
Finally to the monster!! This canvas mini album comes with two canvas pockets that can be put in the ring binder or, as I did here, used elsewhere. I put one in the front of the album with the word "keepsake" spelled out on it to give my bestie a place to put pictures. This one I glued to the back of the book and tucked the monster into him.

Hope y'all enjoy! This project is on display at The Crafty Scrapper. Stop by and take a peek.

Happy Scrappin'!

Amy

Monday, March 17, 2014

Cheerleading album with Shelley

Shelley, here, with a fun Cheerleading Album!

I bought this megaphone chipboard album at The Crafty Scrapper!  It is by Heart of Texas Studios!  I used these cute banner chipboard pieces and letters, and twine by Maya Road to embellish the front.

Here is the 2nd page.  I used a couple of different pieces of paper, some awesome star ribbon, and some zipper trim on this page.

Just a few ribbons and a couple of stickers here!

I used a punch for the paws, then used Glossy Accents over them.

On this page, I used a decorative bottlecap and a cheer girl for a mum on this page!

This is how the book opens up and shows the two pages at a time.

Cool straws and some paw ribbon from The Crafty Scrapper!


Metal corners are my favorite!


Here is the back of the album!


I enjoyed sharing this album with you!  I hope you enjoyed looking!
~Shelley


Monday, February 24, 2014

Simply Us Mini Album with Amy

Hi blogging friends! It's  Amy here today with a mini book to share!

 When I received this paper in one of my design team kits, though the colors were bright, the collection screamed vintage project for me. This sent me rooting around for the small collection of photos I have from my childhood.
Tea cups have been collected in my family for many generations. That particular fetish missed me, but I can't see a teapot or teacup without remembering those who came before me who treasured them. When I knew I was going vintage photos with this project the Maya Road Tea Pot mini album was a sock and shoe kind of decision.


Lots of Maya Road goodness happening here. I sprayed the letters with Maya Mist and then covered them in Stickles and Crackle accents. The paper collection I used on the entire project is Authentique's Flourish collection.


The larger leaves on the flowers were made with the cutouts of the tea pot handle when I originally covered the pots. Save your scraps, it's interesting the number of times I find a use for them in a project!


I used my Vagabond to cut out the flower shapes here out of the scraps I had once I had covered the tea pots. The button was one from my great grandmother's collection which seemed fitting with this particular project.


A picture with all four generations of women is priceless, I used the arrow to direct the eye to flip the page over....

And here is the backside! I used Wendy Vecchi embossing paste and a stencil here for the clock in the background. The envelope is also made of the Authentique paper.
This project is on display as well as all the supplies you need! 
Happy Scrappin'!
Amy

Monday, January 27, 2014

Always and Forever Mini Album with Gena

 Hi everyone, it's Gena here today and I want to share 
a simple album I created with the 
Pebbles Valentine line Yours Truly.

 Each page simply highlights someone I love!
I used some of my favorite dies on the front of the book... the Tim Holtz Word Play and the rosette die. The wood doily is from Maya Road.
On my girls page I added just a flower a some buttons to add a little girly touch.
On my boys page I added this border with metal brads down the edge... it helps to add a masculine feel.
I hope you will come by The Crafty Scrapper and see the rest of the book and pick up the supplies to make yourself a fun book of those you love!

Have you checked out our classes lately? We have some 
awesome classes on the schedule with our fabulous teachers. 
What do you want to learn next???
 
Thanks so much for stopping by today!
See you soon at The Crafty Scrapper!
 Gena